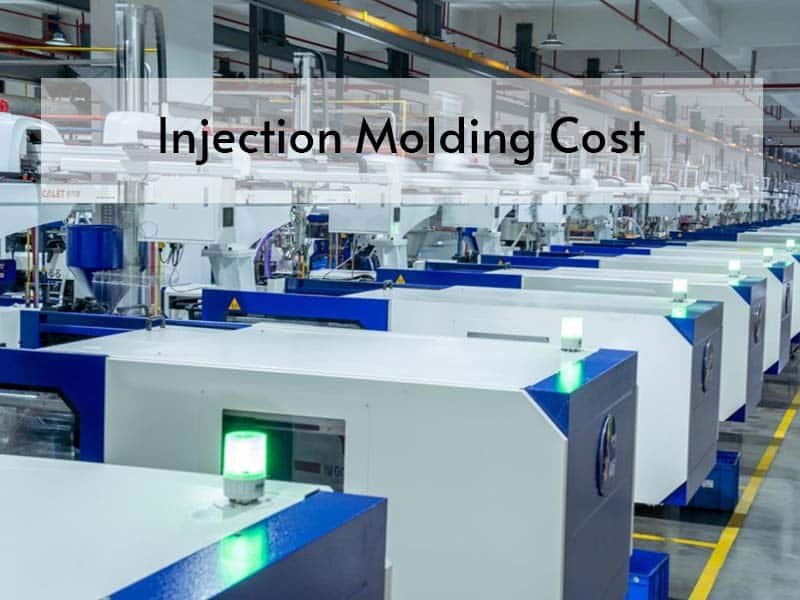
Injection Molding Design Guide
Optimize Your Designs for Superior Performance and Cost Savings. Start crafting high-quality, cost-effective molded products today for lasting results!
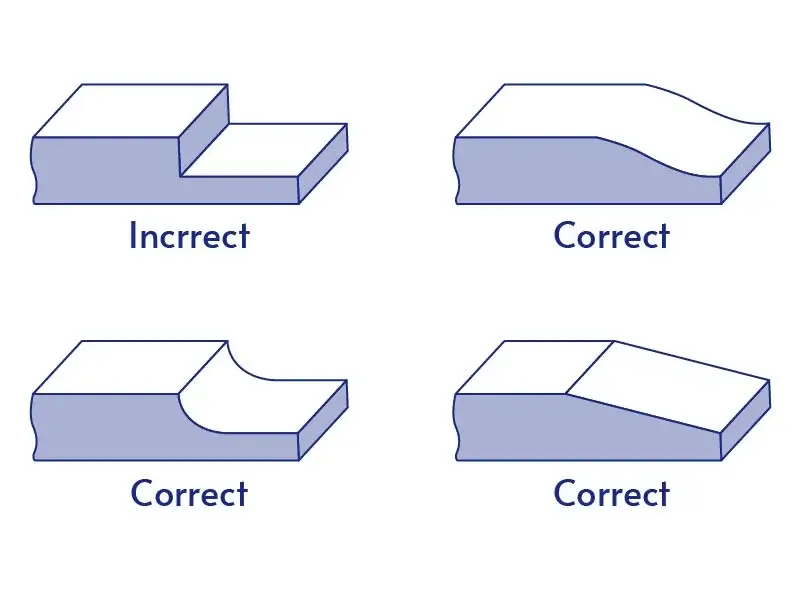
Wall Thickness
When designing plastic parts for injection molding, wall thickness plays a critical role. The key considerations are:
- Minimize Thickness: Reduce cost savings without losing strength.
- Flow & Cooling: Adjust thickness for better material flow and efficient cooling.
- Reinforcement: Strengthen thin-wall areas.
- Consistency: Avoid thick variations to ensure uniform cooling and parting lines.
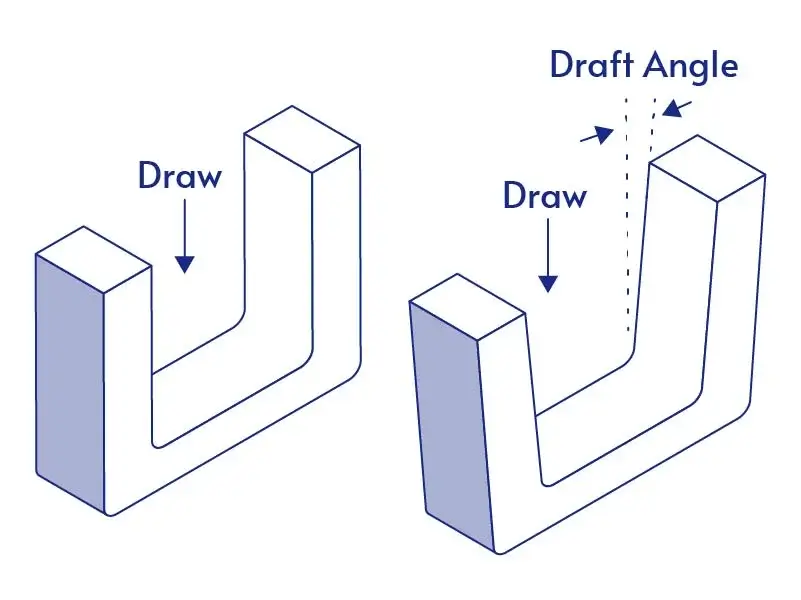
Draft Angles
In injection molding design of plastic parts, the key to the draft angle design is:
- Smooth Demoulding: Ensures easy release without damage.
- Optimal Angle: 1°-3°— too small causes sticking, too large affects appearance.
- Shape: Complex parts may need a larger angle.
- Material: Adjust angles for better results.
- Mold Life: reduces mold wear and extends mold life
- Surface Quality: Excessive draft impacts parting line and finish.
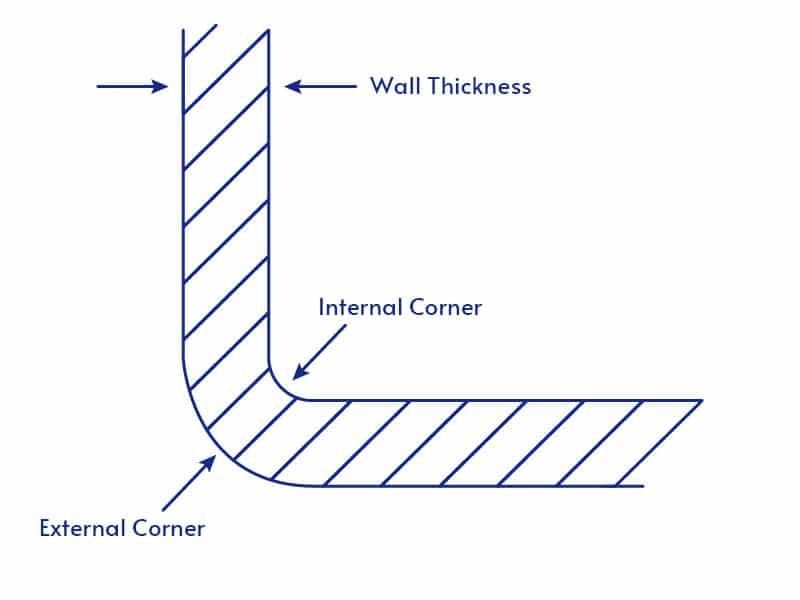
Corners Design Guide
Corner design is a vital aspect of ensuring product quality and mold longevity in injection molding guide. Key considerations include:
- Round Corners: Avoid sharp angles to reduce stress and improve durability. Interior Angles: Larger radii prevent incomplete filling and uneven cooling.
- Outer Corners: Ensure smooth flow to avoid stress.
- Transition Angles: Smooth transitions reduce stress and mold wear.
- Wall Thickness: Coordinate with corner design for even flow and cooling.
- Reinforcement: Proper reinforcement maintains corner strength without disrupting flow.
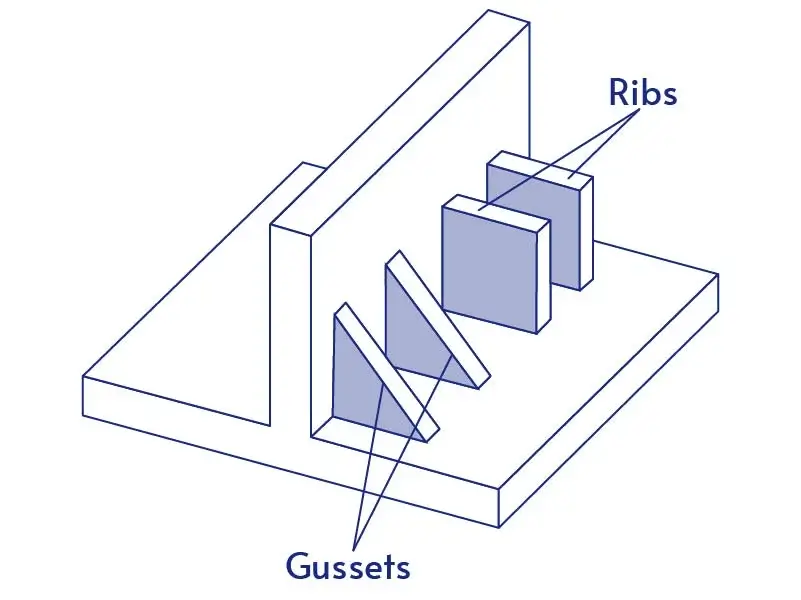
Ribs and Gussets
To enhance strength and stability in plastic part design, ribs and gussets must be designed for:
- Stress Distribution: Ensure even stress distribution to avoid fatigue or deformation.
- Cooling & Flow: Well-designed ribs improve cooling and material flow, reducing defects.
- Die Life: Avoid complex rib designs to prevent mold wear and extend lifespan.
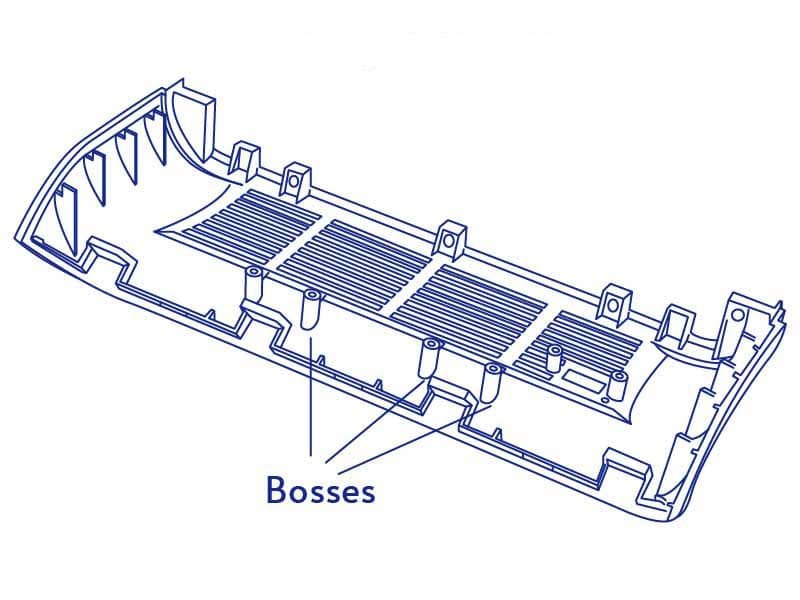
Boss Design Guide
When designing a boss in plastic molding design, the following aspects should be considered:
- Size: Boss diameter 1.5-2x wall thickness for strength.
- Height: Limit to 3x wall thickness.
- Thickness: Thicker walls for strength and even cooling.
- Transitions: Smooth transitions reduce stress.
- Reinforcement: Add where extra strength is needed.

Injection Molding Thread
Thread design is crucial for durability and proper connection. Consider these points:
- Thread Type: Choose from external, internal, or blind threads based on the product’s needs.
- Thread Size: Follow standard sizes to maintain connection strength and avoid molding difficulties.
- Thread Depth: Keep thread depth no greater than 1.5 times the wall thickness to ensure smooth material flow.
Snap Fit Design Guide
For snap fit plastic design, ensure the following key considerations:
- Material: Choose elastic materials to prevent fatigue.
- Buckle Shape: Ensure stability and resistance to external forces.
- Hook Position: Provide enough contact area for a secure fit.
- Demolding Angle: Use a 1°-3° angle for a smooth release.

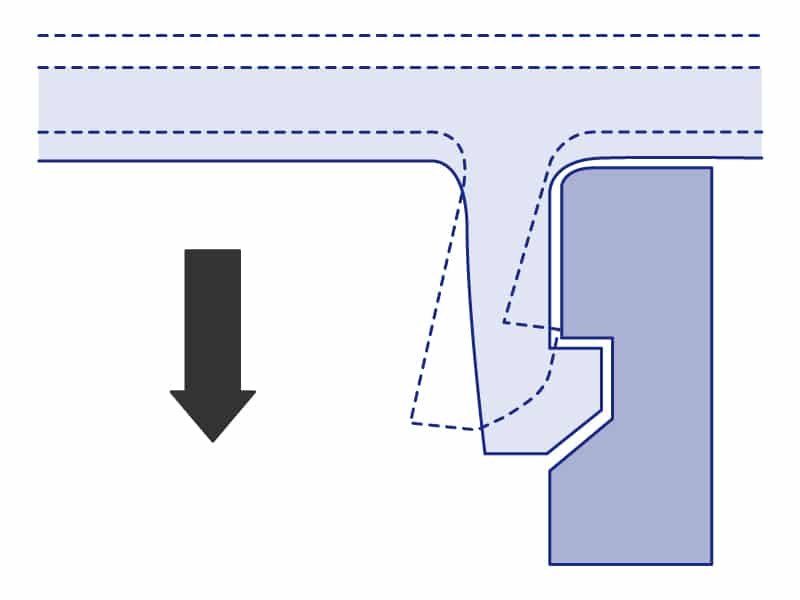
Holes in Injection Molding
Hole design in plastic part design guidelines is key to functionality and strength:
- Hole Size: Choose hole size carefully to avoid molding defects like incomplete filling
- Position: Avoid placing holes at parting surfaces to prevent stripping issues.
- Reinforcement: Reinforce around holes to maintain strength.
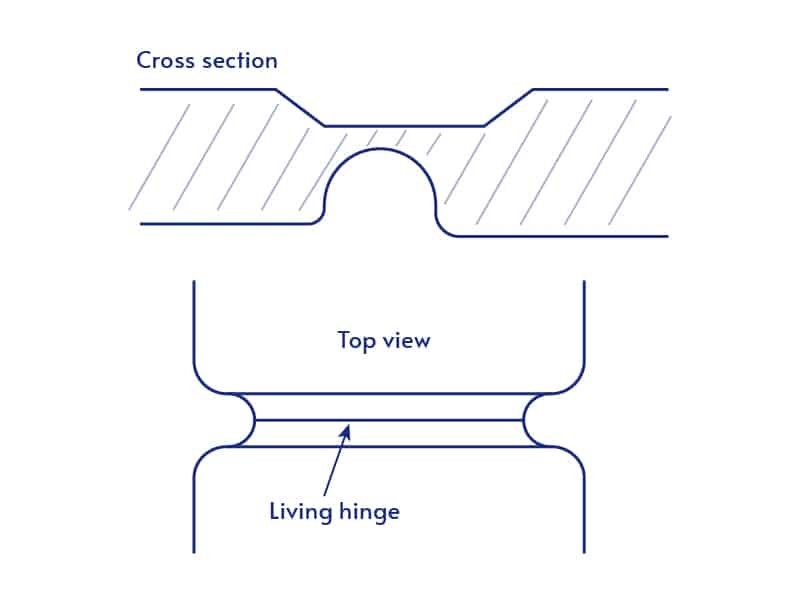
Living Hinge Design
For living hinge design plastic parts ensure:
- Material Selection: Use flexible, fatigue-resistant thermoplastics like polypropylene.
- Hinge Thickness: Maintain a thickness between 0.3mm and 1.5mm for flexibility.
- Bending Radius: Avoid sharp bends and ensure a large enough radius to reduce stress and prolong hinge life.
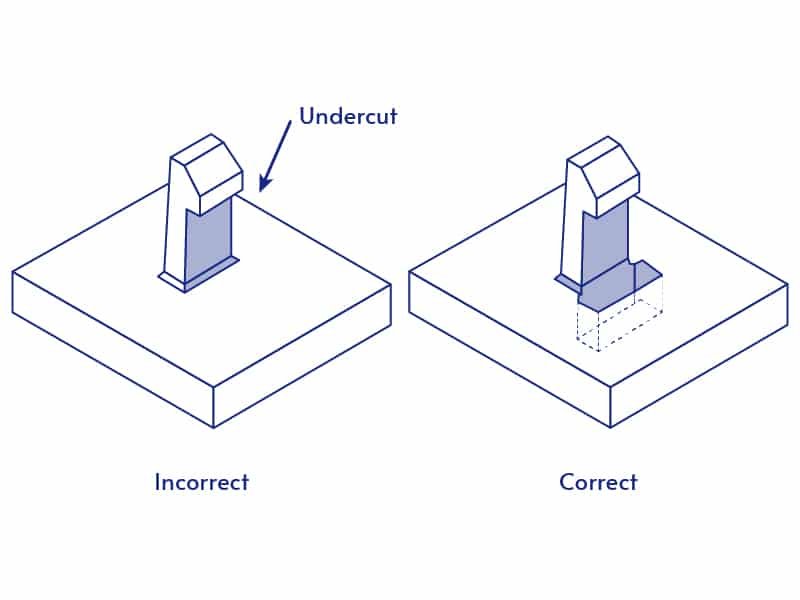
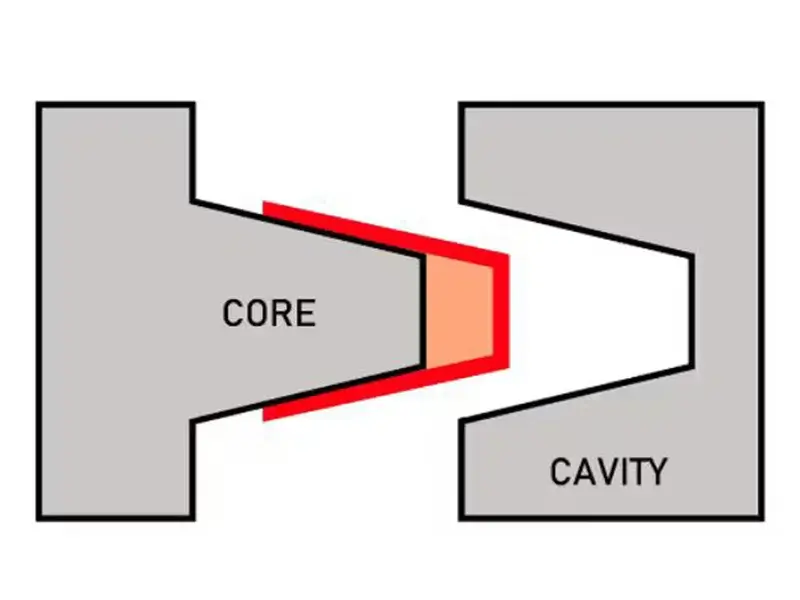
Undercuts Design Guide
An undercut in plastic part design complicates demolding and affects production efficiency. Key factors to consider:
- Demolding Difficulty: Undercuts require special mold structures such as sliders or core pulls, raising costs.
- Die Complexity: Under-cuts increase mold complexity, leading to higher maintenance costs.
- Stress Concentration: Undercuts can cause stress concentration, increasing the risk of cracking.
- Material Flow: Complex concave shapes may cause incomplete filling and uneven cooling.